
This is a guide written specifically for interacting with the XPMGla GitHub. If you would like a general introduction, there are plenty of great guides out there for getting to grips with Git and GitHub. 1
Before you begin…
This guide assumes that you already have a GitHub account, but don’t have Git or the client installed on your machine.
Because it is possible that members of the group might not be able to install the GitHub client on their PC (if they are using a university computer), we have tried to create a workflow for uploading your content to the website using just the browser. This does have limitations, so if you would like to be more involved in the running of the page, you can either use your own machine or ask IT to install the client for you.
Step 1 - Forking
The first thing you want to do is fork from a repository that you want to work on. This creates a copy of the repository under your user, and allows you to make changes without affecting the original repo.
A repository or repo for short is a “directory or storage space where your projects can live.” 2 For example the XPMGla github account has a repo where the webpage is stored. That is where you will be making your changes.
A fork is “a copy of a repository. Forking a repository allows you to freely experiment with changes without affecting the original project.” 3
To fork a copy of the XPMGla repo:
- First, make sure that you are signed in to GitHub
-
Go to the XPMGla website repo, and click on the fork button in the top right-hand corner of the page. It should look like this:

- GitHub will now take you to your forked copy of the repository, which will sit under your own GitHub account. You can make changes to this repo without any consequences to the original project.
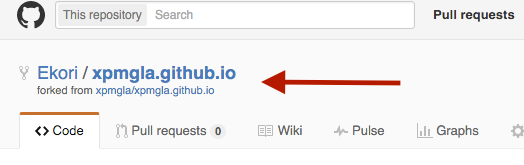
- You can make sure that you are looking at your fork by checking the name of the repo at the top-left of the page.
- You should see a fork symbol, followed by ‘your-username/repository-name’ underneath which will be ‘forked from original-username/repository-name’.
- For example:
You are now ready to make changes to the repo, add posts, events, and other content. Any changes you make will have to be approved and merged back into the original XPMGla repo before they appear on the page, so you are free to experiment with your own fork as much as you want.
To continue reading about adding a post to the XPMGla page, move on to Adding a post using the web client pt.2.
Note: The purpose of this guide is to be accessible to beginners. Plain language is used where possible, but accuracy is important. If you spot any errors, please send me a message/pull request!