
If you are new to GitHub, make sure to read Adding a post using the web client pt.1 first.
Step 2 - Creating a post
If you want to add a post to the webpage, you will have to create a new file within the _posts directory. To do this, go to your fork of the XPMGla page and click on the _posts folder.
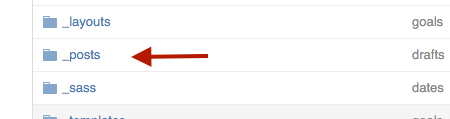
You should see a list of all published posts on the page. You will notice that the title format is YYYY-MM-DD-post-title.md. Make sure that you follow the same conventions for your new post, where the date refers to the date you are adding the post.
Creating a new post
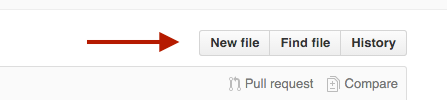
To create a new post, click the ‘new file’ button on the right side of the screen.
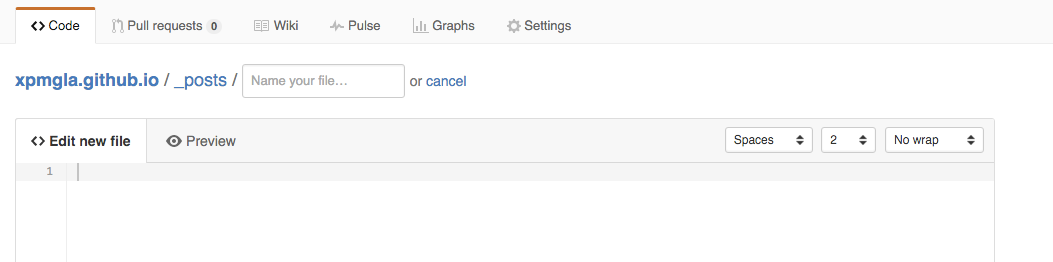
You should be presented with a new screen that has a blank text file you can edit, and a box for naming your file. It should look like this:
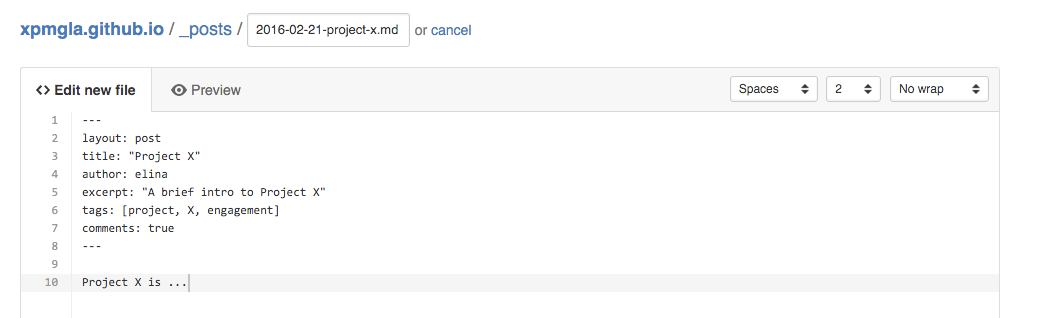
Type the name of your new post into the box, using the YYYY-MM-DD-post-title.md convention. For example 2016-02-21-project-x.md. Make sure to include .md at the end of the filename, as this sets the file type to Markdown, which is important for formatting the text.
Markdown “is a way to style text on the web. You control the display of the document; formatting words as bold or italic, adding images, and creating lists are just a few of the things we can do with Markdown.”1
The site uses Jekyll and Markdown to generate webpages based on existing templates (called layouts). These will be generated automatically, as long as you set the layout parameters at the start of the post.
Jekyll is a site generator that takes your plain text and transforms it into a static website.2
You can see the different types of layout in the _layouts folder. For creating a new post, you would typically use the post layout.
To save time, here is a template you can use:
Continuing with our sample 2016-02-21-project-x.md, your post would look something like this:
Formatting your post
To make your post easier to read, you might want to add some formatting. Markdown makes formatting your posts easy.
Here is an example of how you would add some formatting to your text in your new post:
And here is how the text would look when it is processed with Markdown:
Project X is a project. Here is a bit of bold text about the project. Here is a bit of italicized text. If you want to go crazy, you can combine them for both.
Here is a subheading
Here is a quote that someone had about the project
If you want to put some code inline, you would put back-ticks around it.
If you want to insert some code with syntax highlighting, you can use a code block:
s = "Python syntax highlighting"
print s
You can do quite a lot with Markdown formatting, and there are a lot of great guides that you can use. 3 If you want to preview your formatting before you submit your text, you can use a Markdown editor to do so. 4
When you are ready, move on to Adding a post using the web client pt.3. to read about saving and publishing your post.
Note: The purpose of this guide is to be accessible to beginners. Plain language is used where possible, but accuracy is important. If you spot any errors, please send me a message/pull request!