
If you are new to GitHub, make sure to read Adding a post using the web client pt.1 and Adding a post using the web client pt.2.
Step 3 - Saving and publishing your post
If you are at the stage where you are happy with the post that you are adding to your fork of the XPMGla page, you can save your new document by committing it. Once you’ve done this, you can merge your fork of XPMGla with the Original repository to add the post to the XPMGla website. Remember, the post won’t be published until you request for your personal fork to be merged with the original (or origin).
Saving (committing) your file
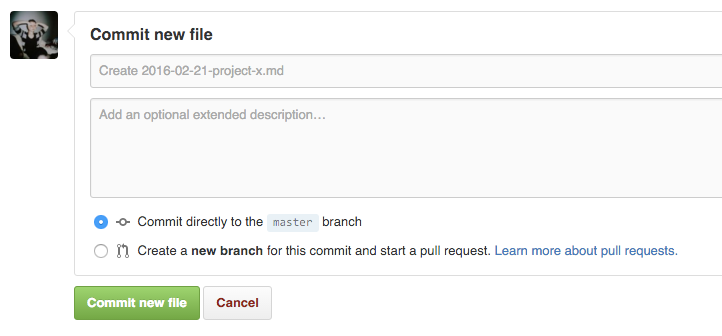
After you have finished your post, you will have to commit the new file. At the bottom of the page, you will see the options for committing your file:
A commit, or “revision”, is “an individual change to a file (or set of files). It’s like when you save a file, except with Git, every time you save it creates a unique ID (a.k.a. the “SHA” or “hash”) that allows you to keep record of what changes were made when and by who. Commits usually contain a commit message which is a brief description of what changes were made.”1
Labelling your commit
To save your file to GitHub, you have to provide a name for your commit. This will act as a label for the changes you have made, which in this instance will be the new post. As you can see, GitHub gives you a suggestion for your commit: ‘Create 2016-02-21-project-x.md’. You can use the suggestion, or enter your own commit message. Make sure that your commit is descriptive (‘New post - Project X’,’Fixed typos’, etc.)
You can also add an optional extended description of the changes that you’ve made.
Choosing a branch
You can also choose to commit directly to the master branch or create a new branch. This depends on the degree of changes that you’re making. For example, are you trying out a whole new look for the page? Probably best to start a new branch so that you can switch between that and the orginal version easily. If you’re just adding a new post, or making some edits, you can commit to the master without worrying too much.
Here is an example of the commit message and optional description for the new Project X post:
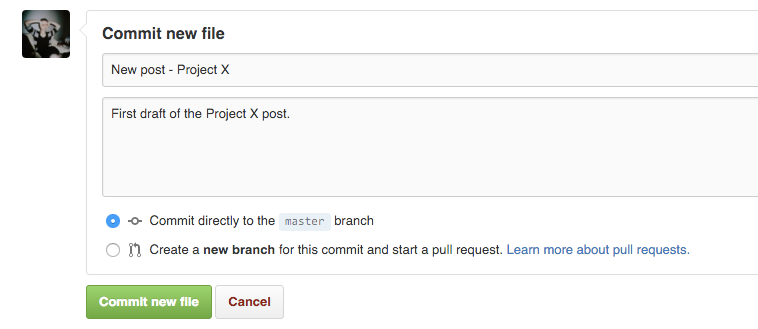
You can now go ahead and commit the new file (by pressing the ‘Commit new file’ button).
Checking your changes
After committing your changes, GitHub will take you back to the _posts directory (or whichever directory you were making changes in). You should see your commit reflected in your branch history:
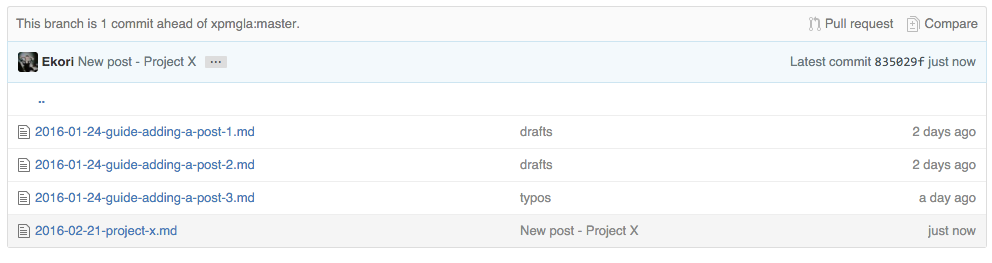
You should also see a message at the top that your branch is ‘1 commit ahead of xpmgla:master’. When you commit a change to your repository, you are only making a change to your version (fork) of the website. You need to merge your fork with the original (origin) for the changes to be reflected on the XPMGla website.
You can do this with a pull request.
Merging changes (pull requests)
Pull requests ‘are proposed changes to a repository submitted by a user and accepted or rejected by a repository’s collaborators. Like issues, pull requests each have their own discussion forum.’2
To submit a pull request to the XPMGla original repository using the web client, you can select ‘pull request’ from the right corner of the ribbon above your directory:

Comparing changes
Before you create your pull request, you will be taken to a screen where you can look over and compare the changes that you propose to make.
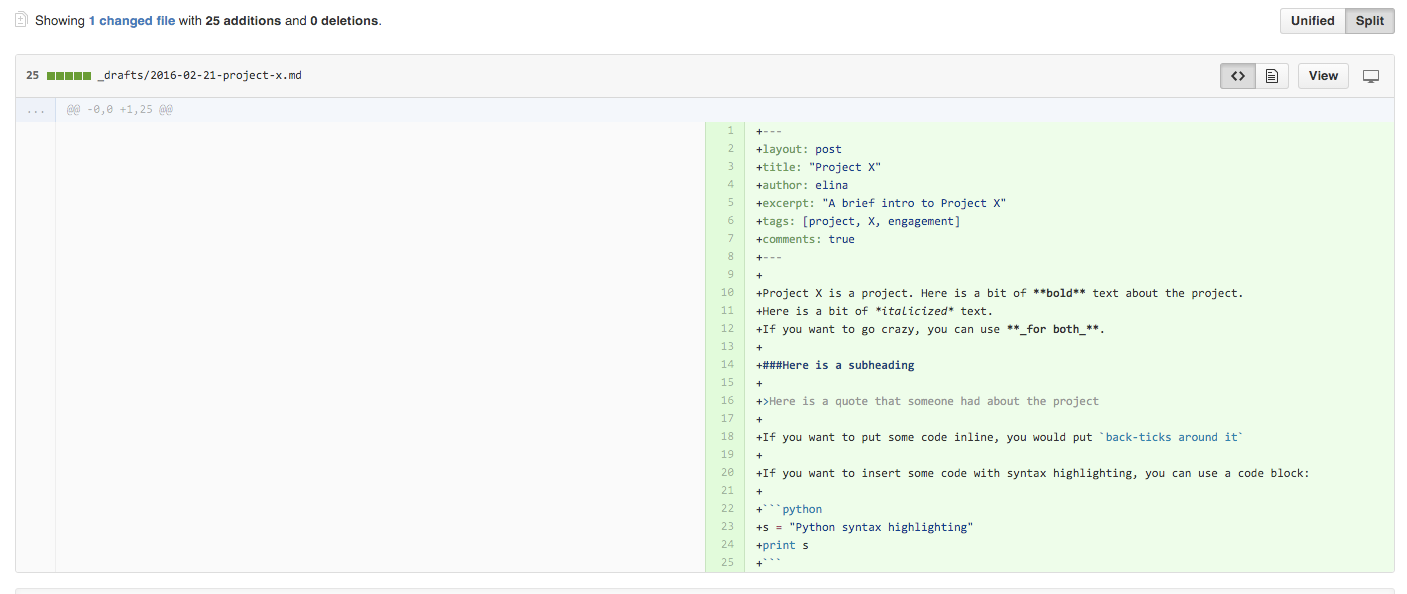
If there are no conflicts between your proposed changes and the original master branch, you should see a notification that your ‘branches can be automatically merged’
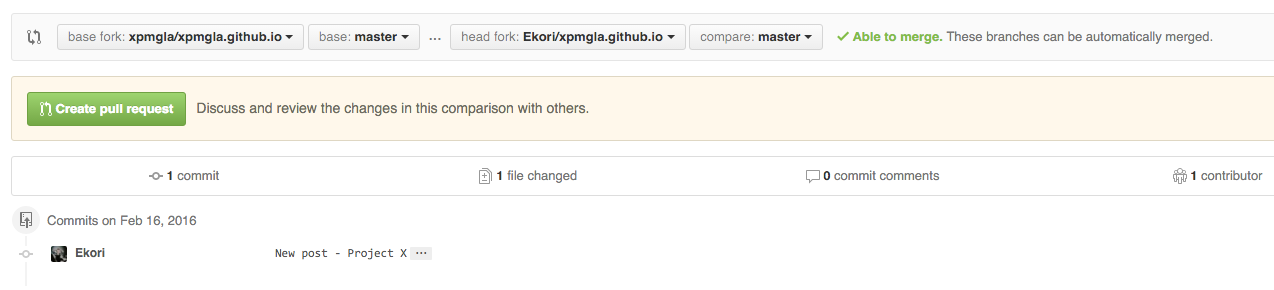
Below that, you will also see a detailed overview of all of the changes you have made. + indicates an addition, while - indicated a deletion.
If everything looks OK, you can press the ‘Create pull request’ button to submit your request.
Checking the commit
After clicking ‘Create pull request’, you will be given the option to change your commit message and description.
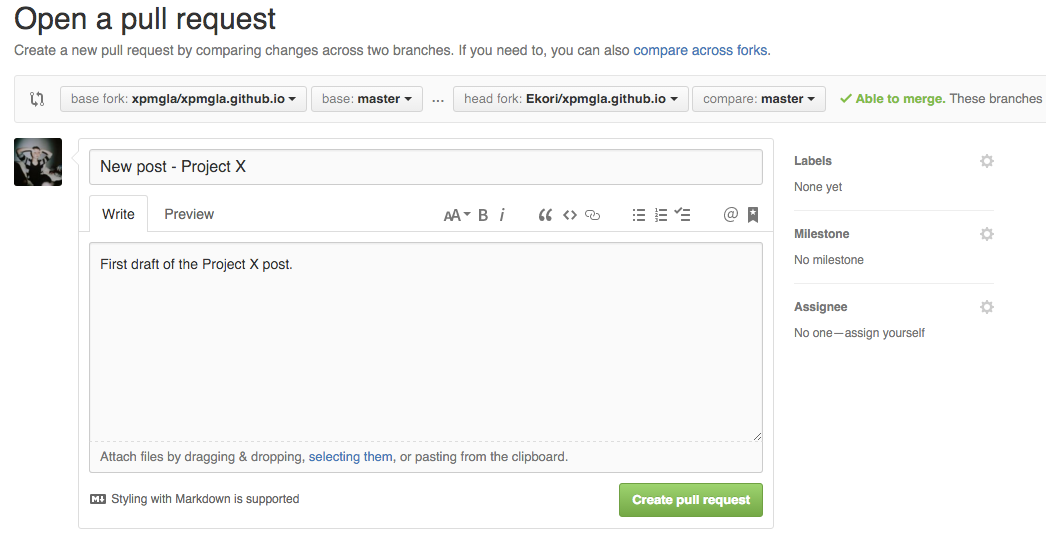
You can also add ‘Labels’, ‘Milestones’ and add an ‘Assignee’ using the settings on the right of the screen. These are optional, and you are unlikely to need these for the XPMGla website.
Make any changes necessary (or stick to the original commit) and click ‘create pull request’ when you’re ready.
Approval
Your pull request will be submitted for approval. The repository moderators will be notified of the open request, and they can choose to approve (merge) or deny your request (subject to explanation). They also have to option of adding a message at this stage.
You can check the status of your pull requests in the ‘Pull Requests’ tab at the top of the screen.

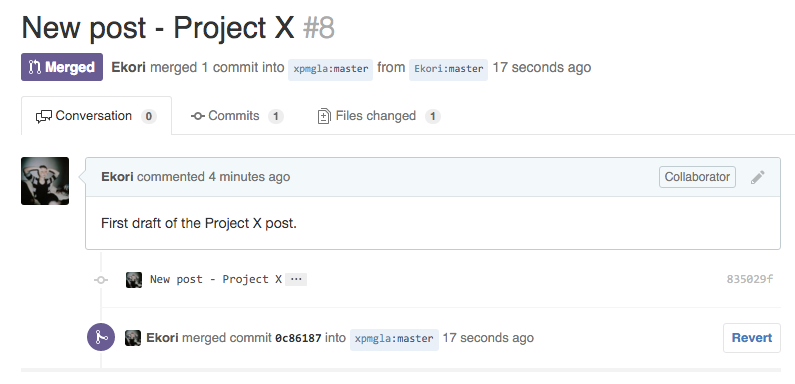
Once your request is approved, the status will change from ‘Open’ to ‘Merged’.
An open request:

A merged request:
That’s it!
After your pull request is merged with the original master branch, your post should appear in the XPMGla GitHub repository and on the website!
Further reading
This guide is pretty specific, so if you’d like to learn more, here are a few useful resources:
- Harvard-Crimson How To Use Git Guide
- Git Reference
- The most useful git commands
- Basic Git Commands Atlassian
- ProGit book
- Git Reference (Official docs)
- Git commands
Note: The purpose of this guide is to be accessible to beginners. Plain language is used where possible, but accuracy is important. If you spot any errors, please send me a message/pull request!